Installation Guide
Simple steps for installing your Guard Blinds.
For your convenience, you can either watch the installation video below or follow the detailed step-by-step written instructions beneath the video. Both options will guide you through the process to ensure a smooth installation of your Guard.

What's in the box?
Assembly Parts
Weather Strip
Brush Strip
Screwdriver
Everything you need for the installation is provided in the box—no extra tools or materials are required.
What you will need

Screwdriver
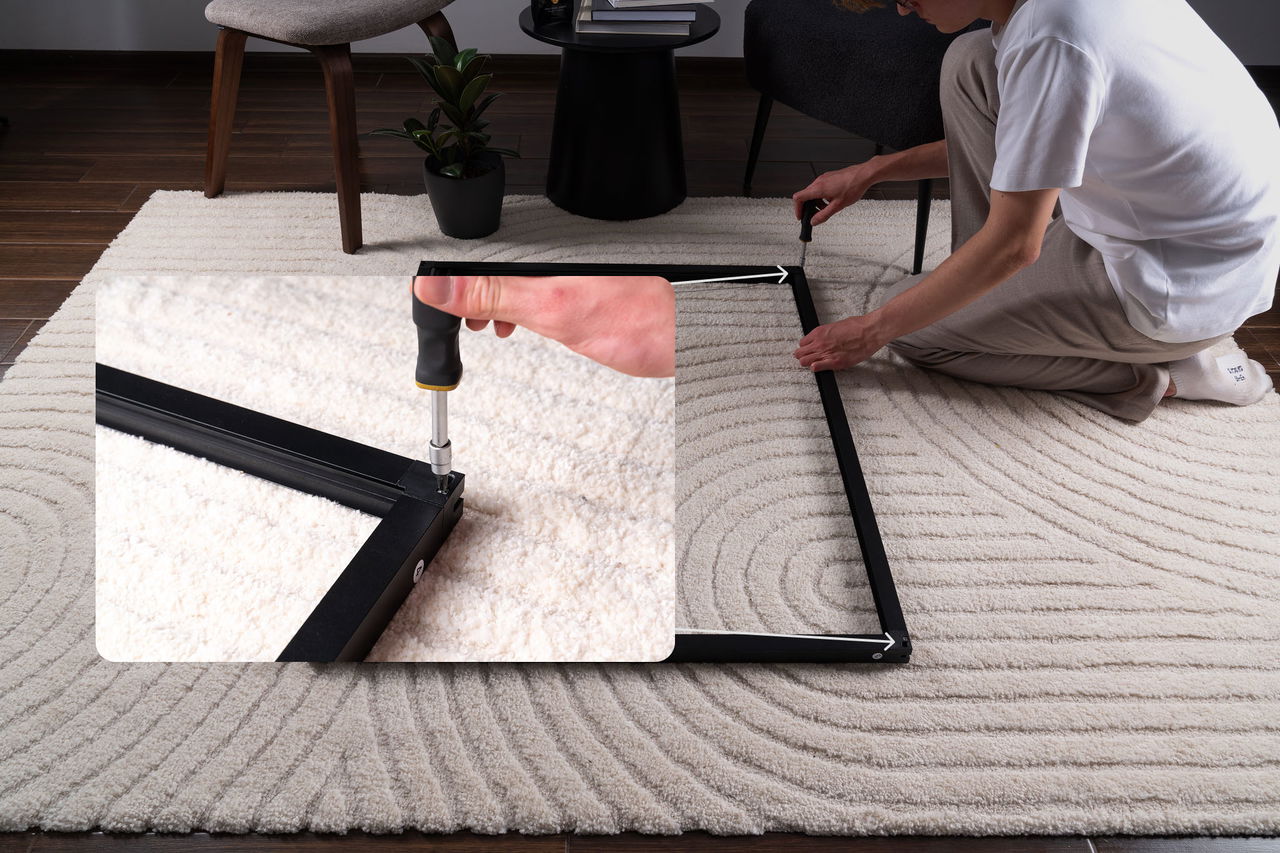
Step 5: Insert the Screws
Put all 4 screws back in by inserting them through the holes of the connected frames. Ensure each screw passes through both frames to secure the connection, then tighten them securely to maintain a stable structure.
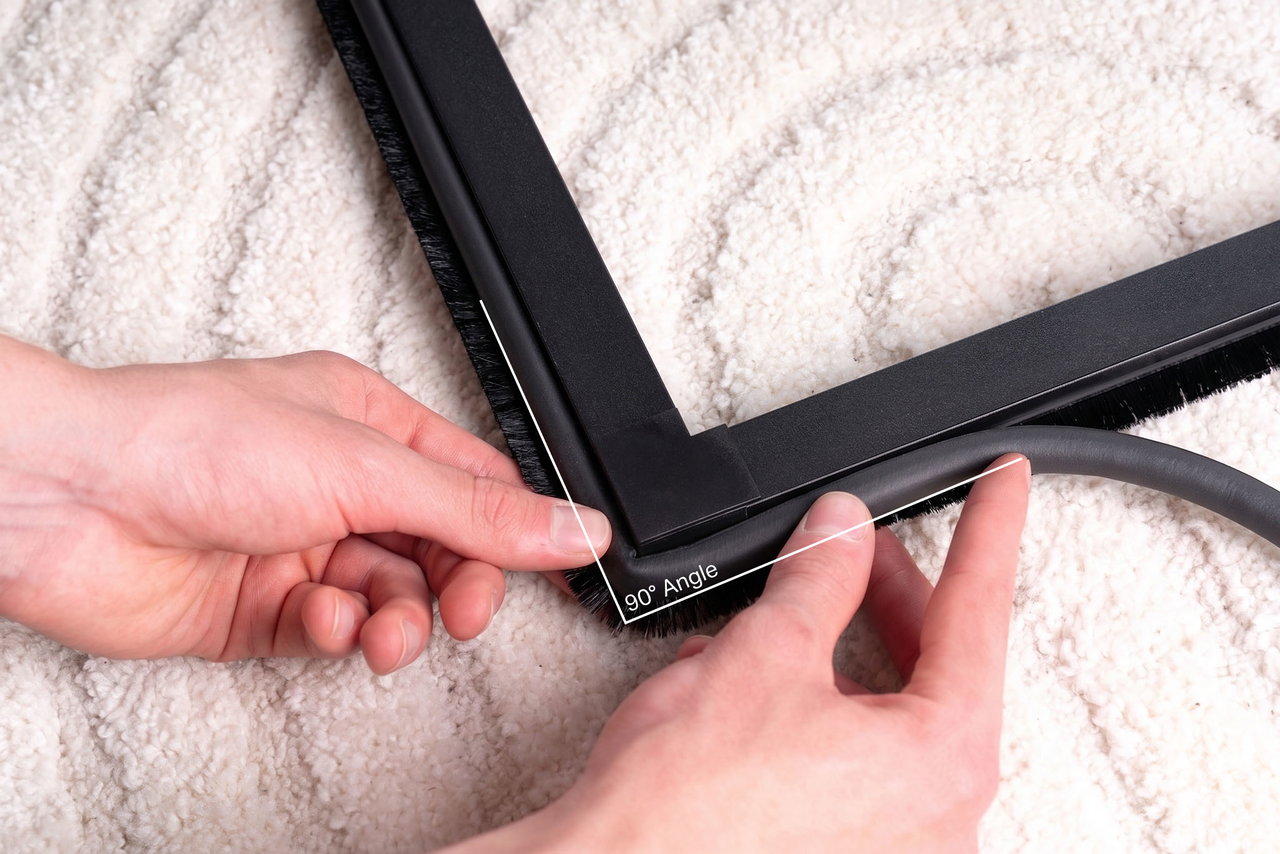
Cut at the Corners
Cut the brush strip at every corner. Start a new piece on each side to keep a clean 90-degree seam and prevent gaps or light leaks.
Step 4: Prepare the Recess for Mounting
1. Drill Deeper Holes: Deepen the holes you drilled in Step 2 by drilling them to a depth of 8mm, ensuring there's enough space for the wall plugs.
2. Insert Wall Plugs: After drilling, insert the provided wall plugs into the holes.
4
5
Step 5: Apply Double-Sided Tape
Before placing the Guard back into the recess, apply double-sided tape to the bottom of the bottom frame. Be sure to remove the protective backing from the tape to expose the sticky side.
Step 6: Place Guard Back into the Recess
Position the Guard back into the window recess and align it with the drilled holes. Make sure the Guard is firmly stuck to the bottom of the recess using the double-sided tape applied in the previous step.
6
7
Step 7: Fix Screws into the Top Frame
With the Guard back in place, fix the screws into the pre-drilled holes in the top frame, securing it firmly into the window recess. Make sure the screws are tightened securely for a strong hold.
Step 8: Seal the Edges
Using a caulking gun, apply caulk around the edges of the Guard. Once applied, smooth out the caulk to ensure a clean, even seal that prevents light or air from seeping through.
8
Five steps to assemble Guard
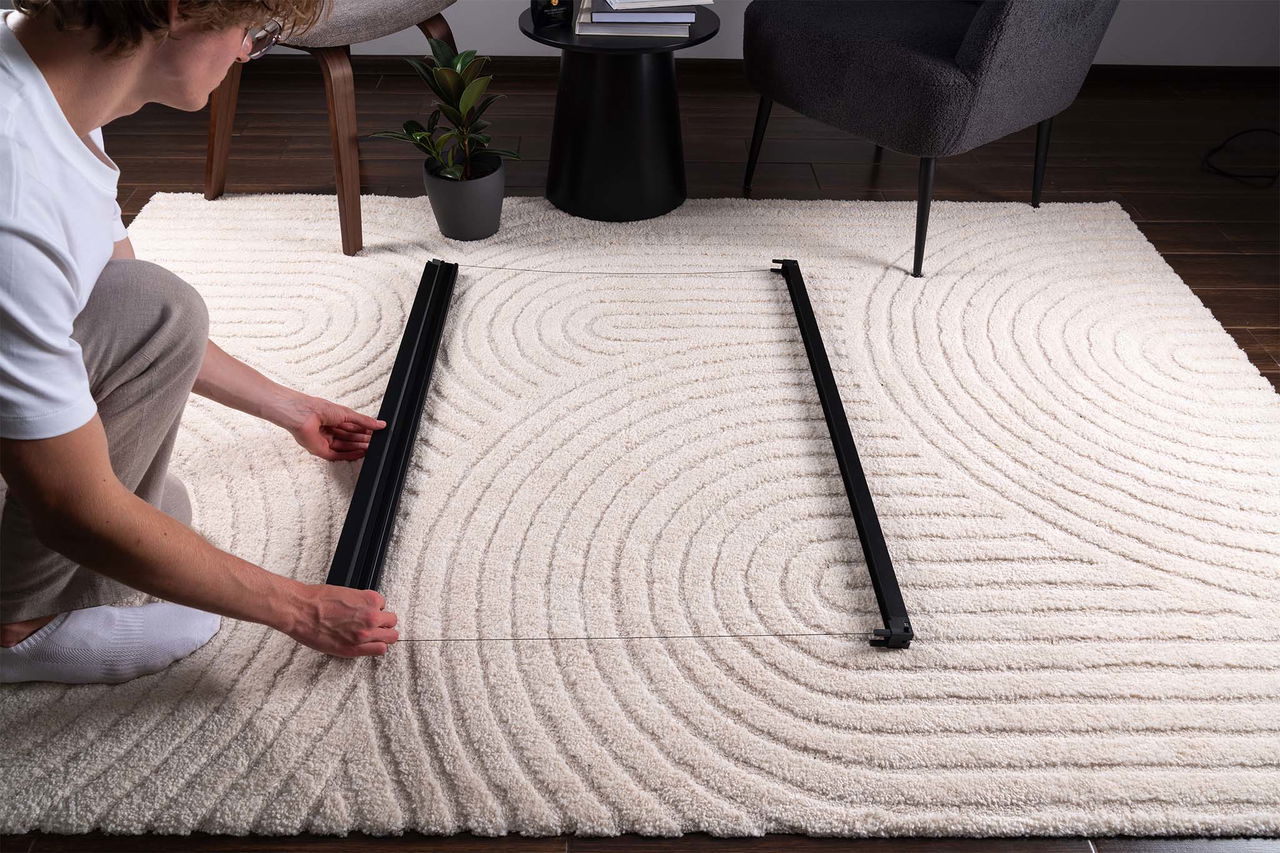
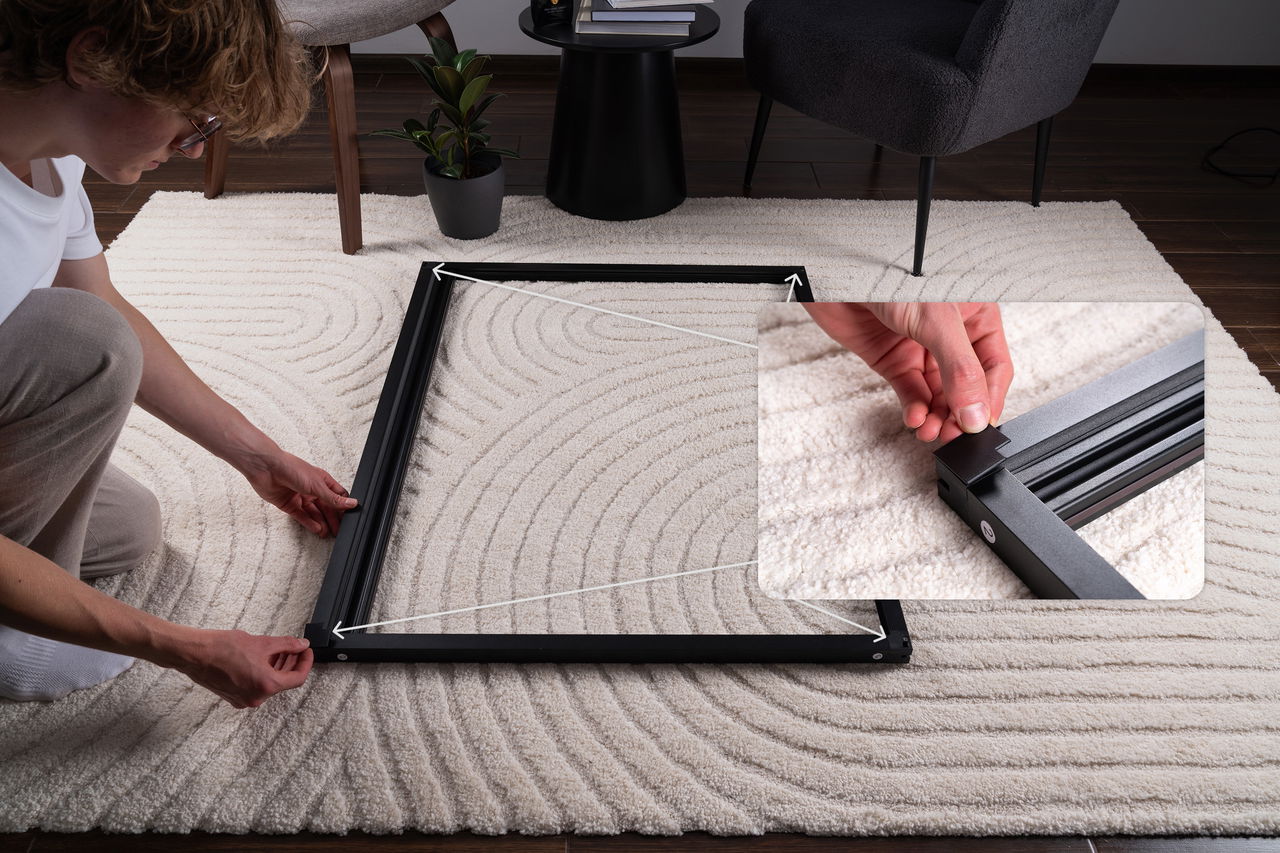
Step 1: Lay Out the Side Frames
Unpack the side frames and place them on a clean, flat surface, parallel to each other with their inner channels facing inward for assembly.
3. Position the Fabric Frame: Place the fabric frame on the right side.
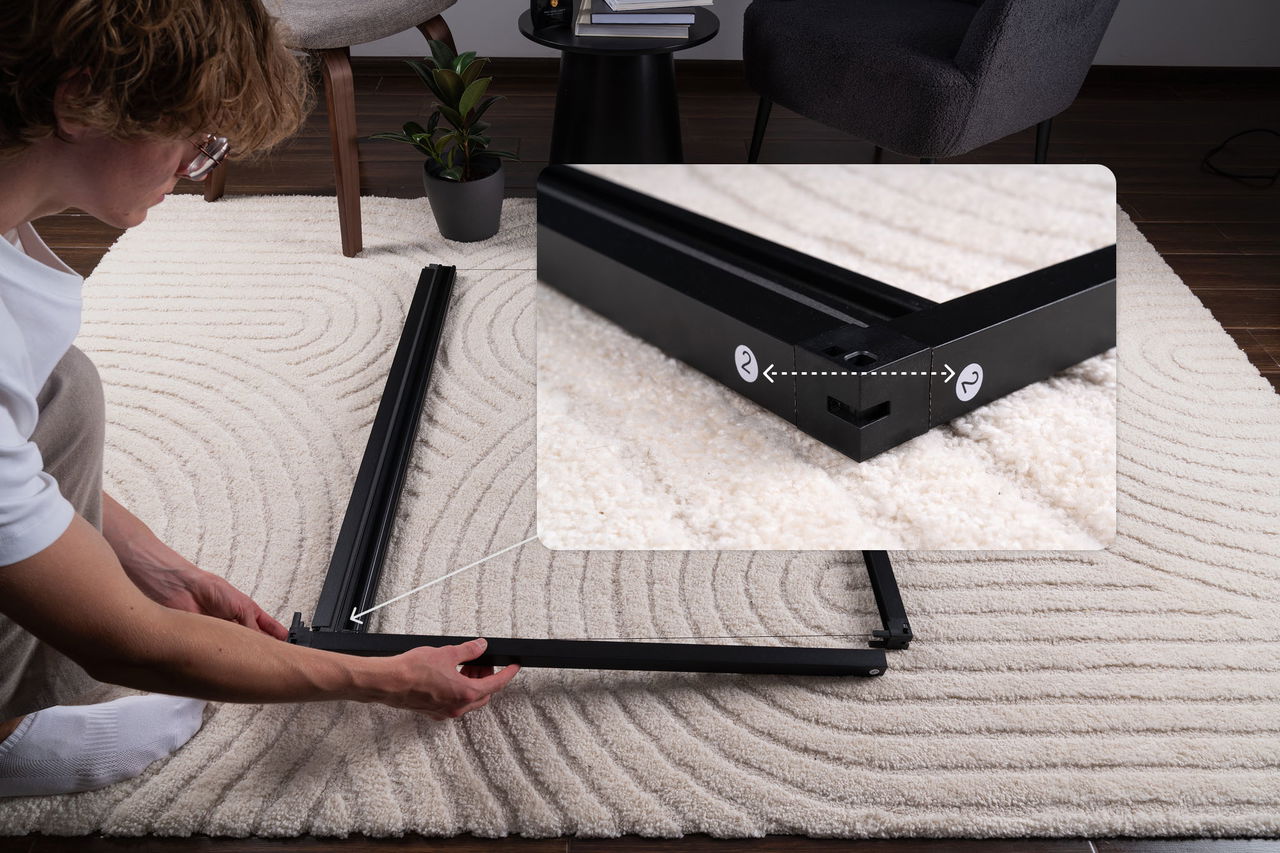
Step 2: Position the Top and Bottom Frames
Place the top and bottom frames parallel to each other, and verify that the numbered labels on the adjoining ends match.
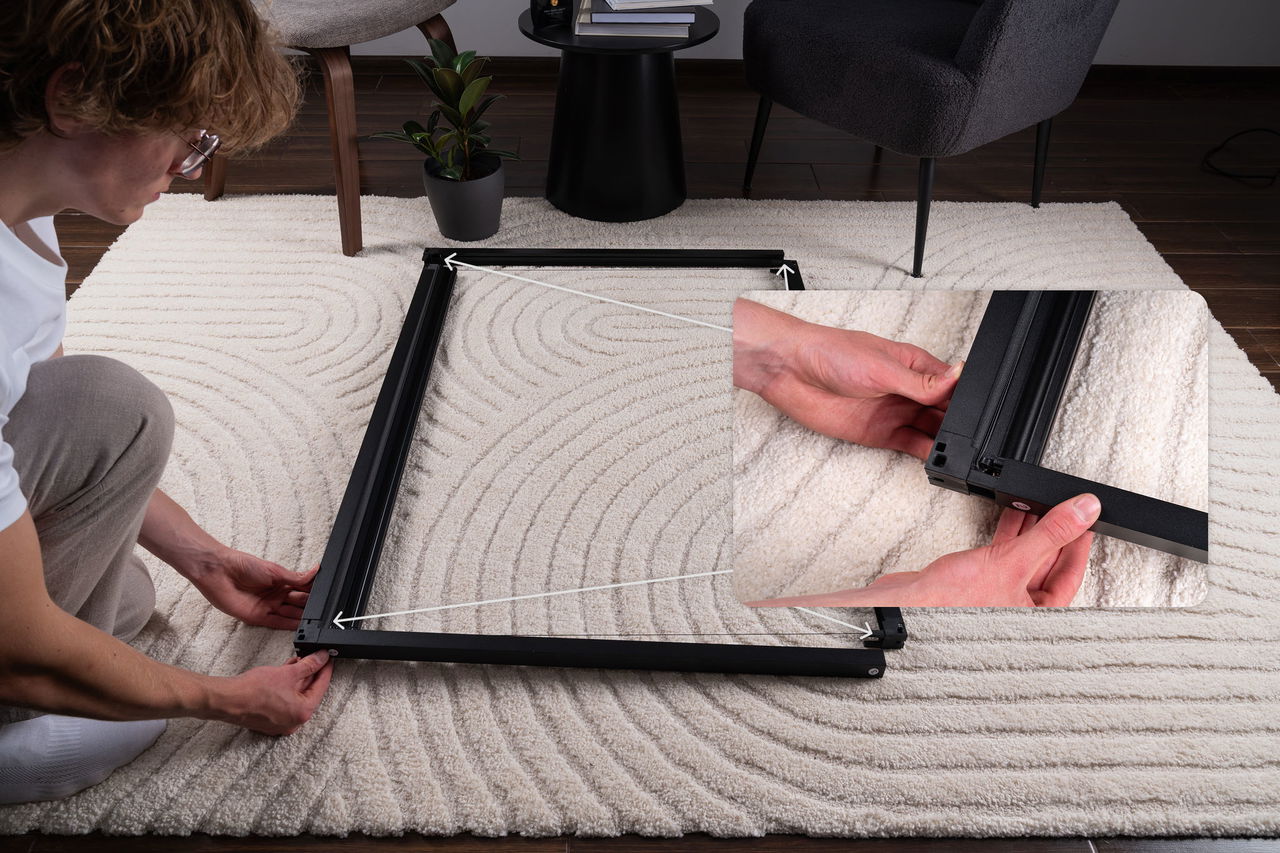
Step 3: Connect the Frames
Connect all of the frames together by connecting the fabric and the side frame with the top and bottom frames.
After connecting the frames, test the blinds by closing them to see if they latch properly.
Step 4: Tighten the Cords
(Skip this step if your blinds latched properly in Step 3)
Using the included screwdriver, turn the two screws in either direction until the internal cords tighten. Make sure the cords are tightened evenly on both sides.
Note: Higher cord tension will require more effort to close the blinds - set it to your preference, but if the cords are too loose the blinds may not fully close and can pop back.
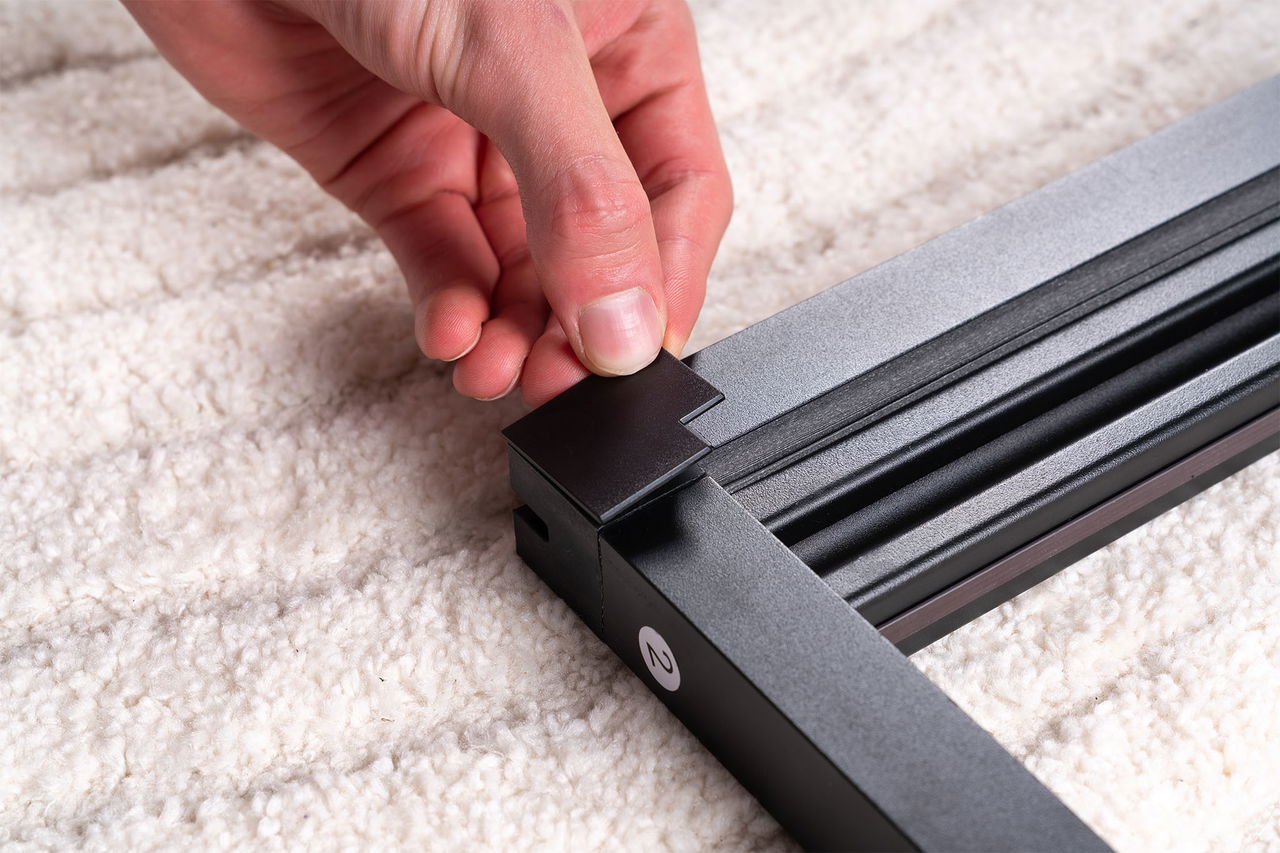
Step 5: Insert the Corner Caps
Press-fit the 8 included corner caps onto all frame corners - 4 on the front side, 4 on the back side. Ensure every cap sits perfectly flush to protect the edges and to ensure no light leaks through the corners.
Six steps to install Guard
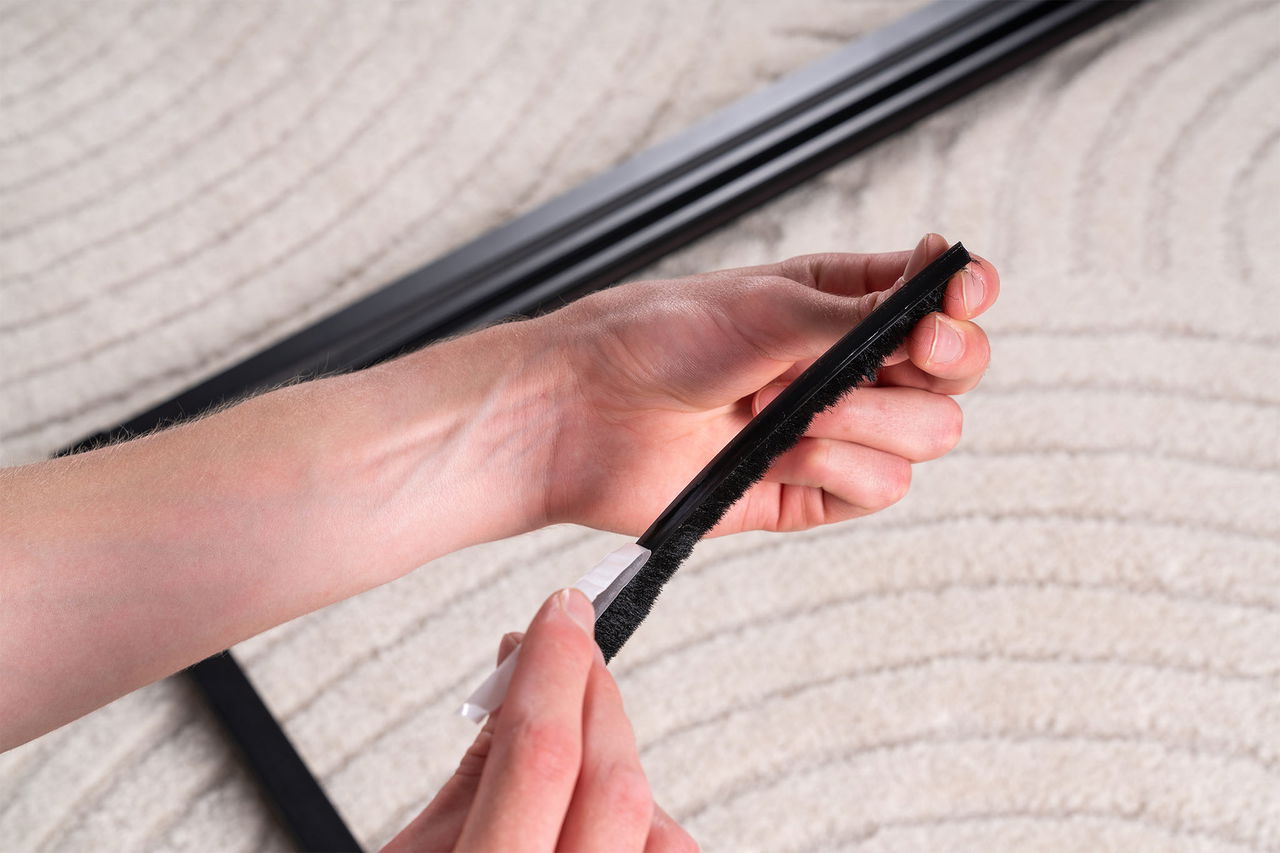
Step 1: Peel back the brush strip backing
Peel off a small part of the protective backing from the brush strip - just enough to get started. You'll keep peeling as you apply it.
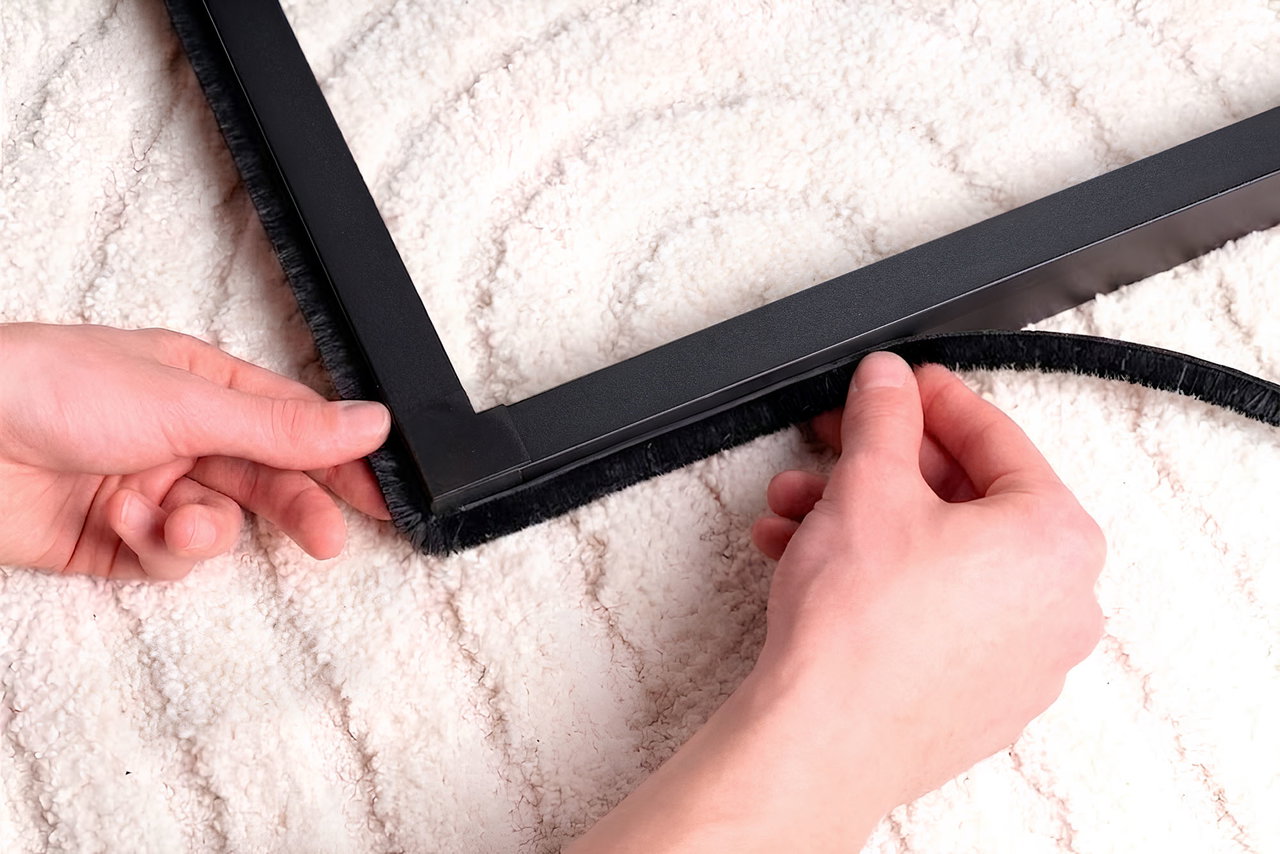
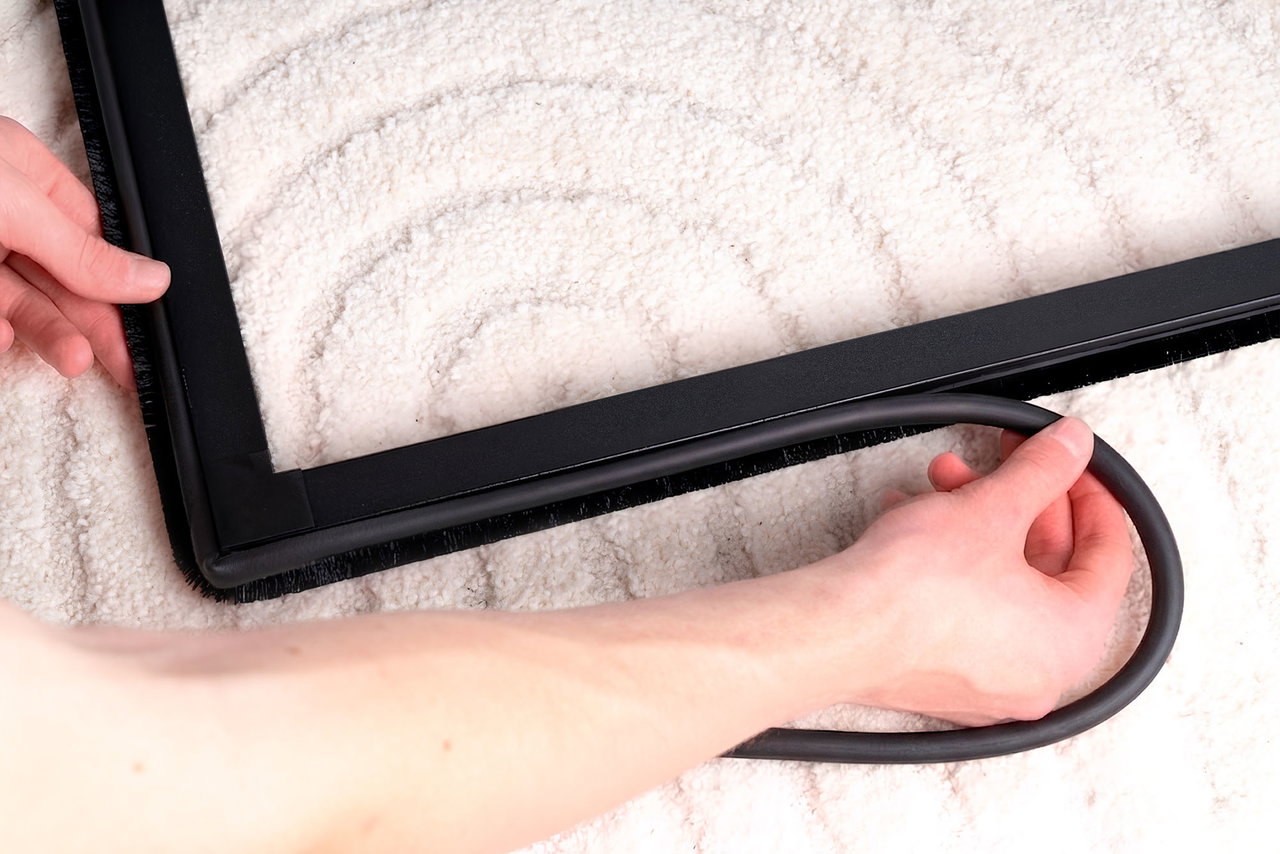
Step 2: Apply the brush strip
Press the brush strip down as close to the back side of the frame as possible, leaving free space above it for the weather strip. Peel back more of the backing as you work your way along each side. Cut away any excess at the end, then repeat on all four sides.
Note: At every corner, press the strip so it forms a clean 90° angle.
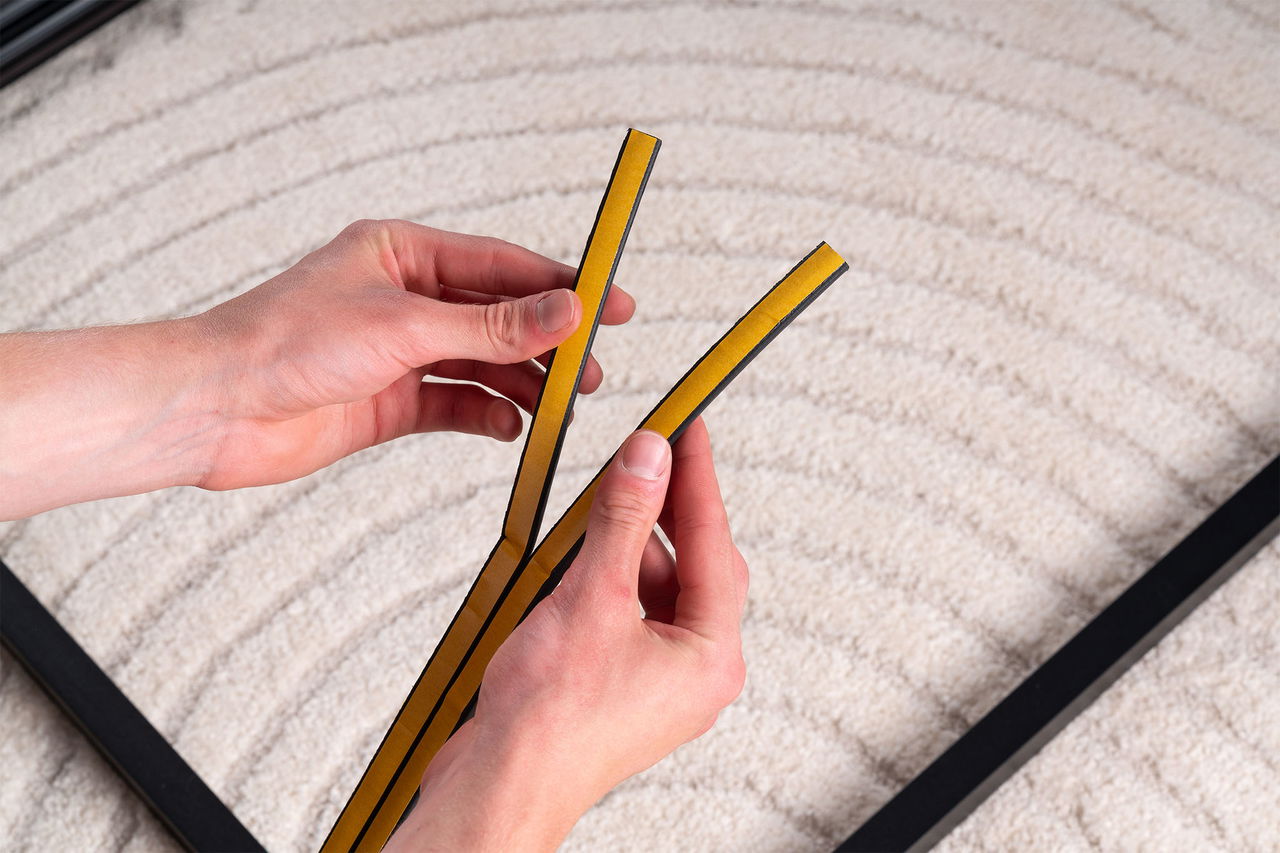
Step 3: Split the weather strip
Split the provided weather strip into two equal parts.

Step 4: Peel back the weather strip backing
Peel a small length of the protective backing off one end of the weather strip to begin. You'll peel away the rest as you go.
Step 5: Apply the Weather Strip
Apply the weather strip directly above the brush strip. Continue peeling the backing as you go, and cut away any excess at the end. Cover all four sides without gaps.
Form the Corners
When applying the weather strip, do not stretch it across corners. Keep it relaxed and fully seated, forming a clean 90-degree angle to match the frame. If pulled too tightly, it may create small gaps in the corners where light can leak through.
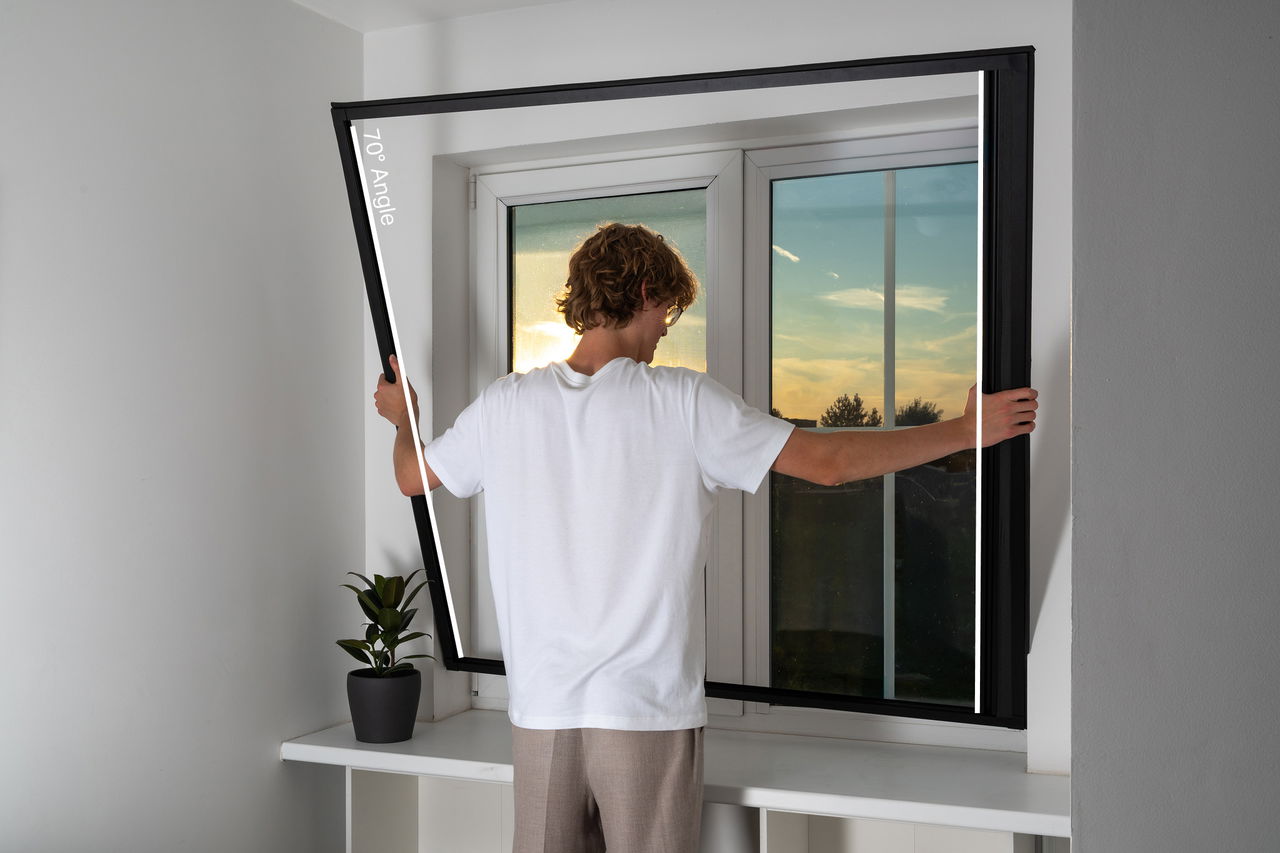
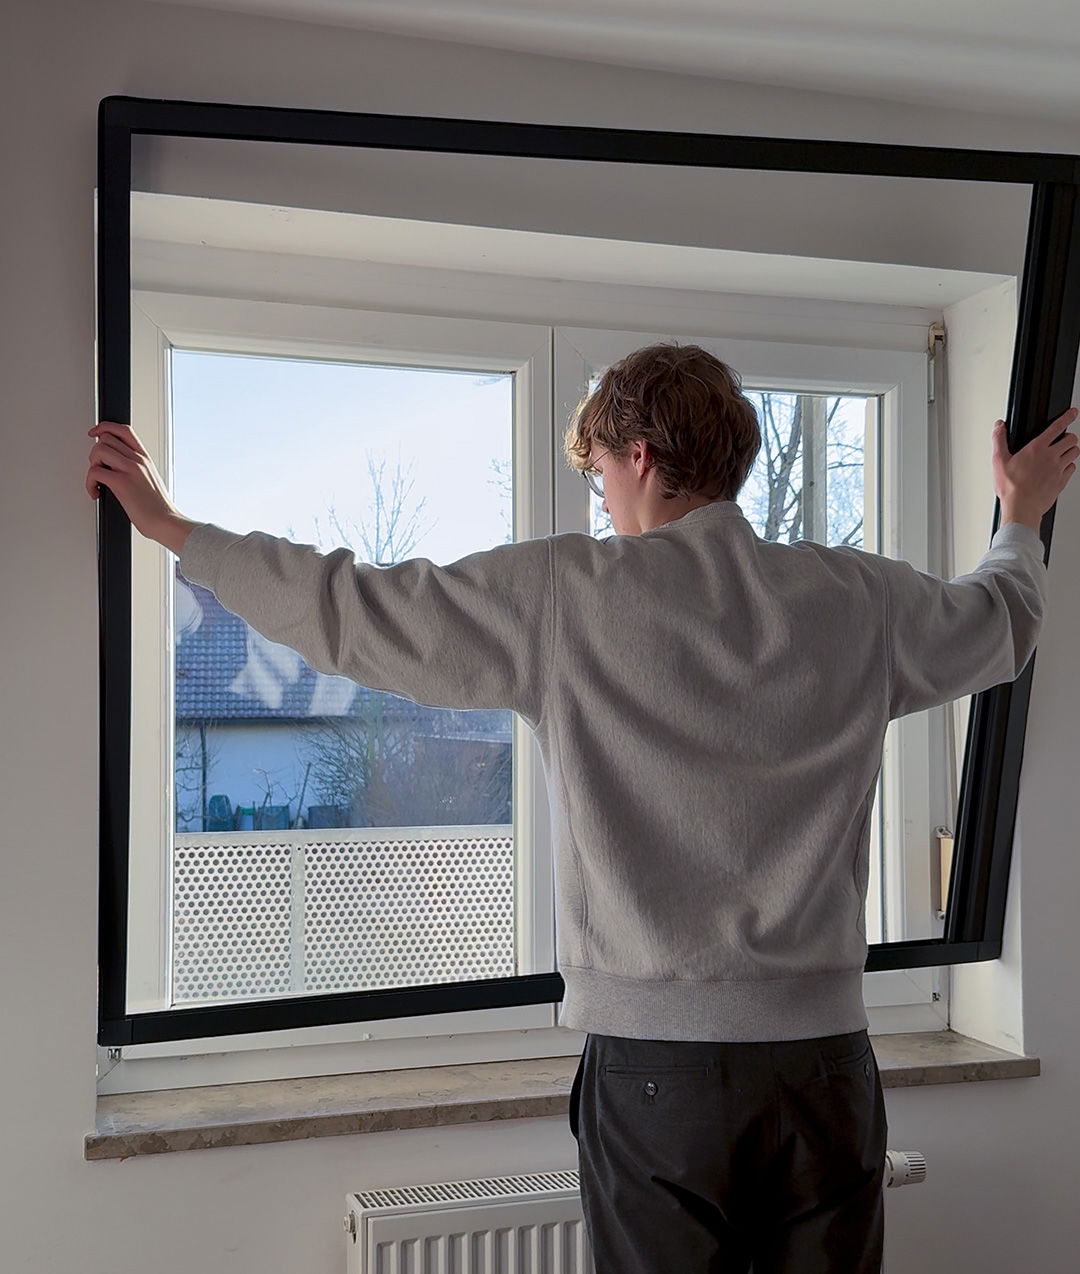
Step 6: Insert and Test Guard
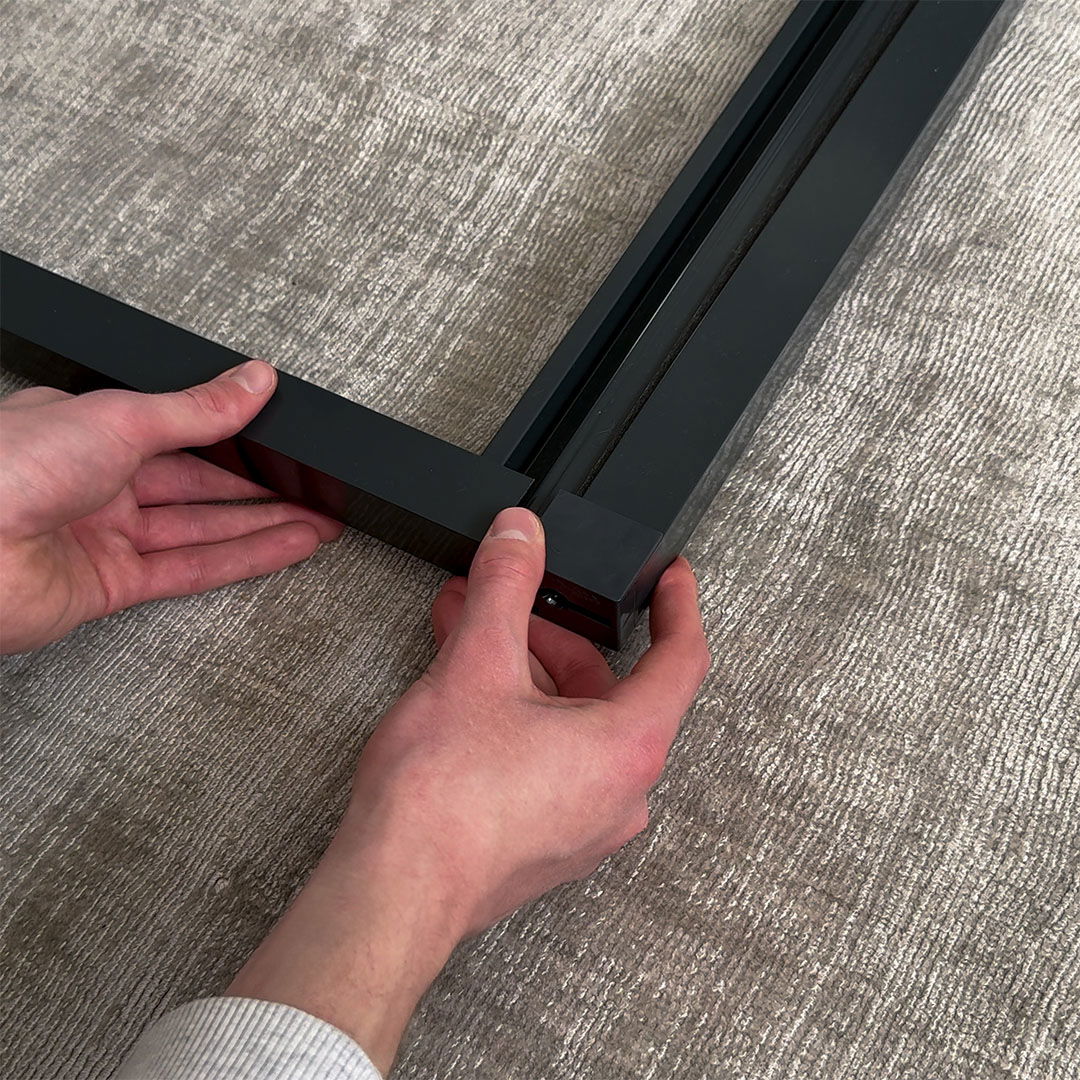
Insert the blinds into your window recess at a 70-degree angle. Start by guiding the bottom of the blinds into place, pushing it firmly to the bottom first, then finish by pushing the top of the blinds into position. Once inserted, test the blinds by opening and closing them.
FAQs
Guard features a unique track system that eliminates gaps between the blinds and the window frame to ensure total darkness. The dual-layered honeycomb fabric combines non-woven polyester with a reflective thermal barrier to block light, insulate against heat, and reduce noise.
Guard is designed to fit most standard window types, but there are a few considerations.
Guard won't fit windows that are not square. Additionally, the blinds require at least 1.18 inches of unobstructed recess space for proper installation. If your window doesn't meet these criteria, Guard may not be suitable for you.
Here's a list of compatible and incompatible window types to help you determine if our product is the right fit for your home:
European Windows
Tilt-and-Turn Windows
Fixed Windows
Sliding Windows
Casement Windows
Hung Windows
Sash Windows
Bay Windows
Awning Windows
Skylights
Arched windows
To ensure correct measurements, please read our Measuring Guide. It's important that your measurements are accurate and precise, as they are crucial for the blinds to fit properly. Incorrect measurements will result in the blinds not fitting your windows.
Guard is low-maintenance. The non-woven polyester fabric resists dust and stains, requiring only occasional cleaning with a damp cloth. No special cleaners or treatments are necessary.
Yes, our Bits are safe for sensitive teeth. We use Nano-hydroxyapatite in our Fluoride-Free formula, a mineral that's been proven to strengthen and remineralize enamel and help fight sensitivity.
Read the nHAP Study here and read more information about it here.
We also recommend talking to your dentist about Nano-hydroxyapatite or when making any changes to your oral care routine.
The interior of the Guard matches your fabric choice, while the exterior is always Quartz to reflect light. For example, if you select Graphite, the interior side will be Graphite, but the exterior will remain Quartz. This design ensures a uniform appearance from the outside and is intended to reflect light.
To install Guard, follow our step-by-step instructions in our Installation Guide.
To place an order for Guard, please follow these steps:
Select a Color Combination:
Choose from the four available color options for both the frame and the fabric to find the combination that best suits your space.
Choose Size Ranges:
Width Range: Select the range that your window's width falls into. This is a general range, not the exact measurement. Height Range: Select the range that your window's height falls into.
Enter Exact Measurements:
Input your window's exact width and height measurements in inches and sixteenths. This ensures a precise fit for your custom blinds.
Add the Product to Cart: Once you've selected your options and entered your measurements, click the "Add to Cart" button. The cart drawer will open, allowing you to review your selection.
Proceed to Checkout:
Click on the "Checkout" button. You will be redirected to the checkout page where you can review your order and complete the payment process.
If you need assistance at any point during the ordering process, feel free to contact our customer support team at support@guardblinds.com.
Lorem ipsum dolor sit amet, consectetur adipiscing elit. Integer nec odio. Praesent libero. Sed cursus ante dapibus diam. Sed nisi. Nulla quis sem at nibh elementum imperdiet.
Contact Support
Need help? Our Support Team is ready to assist you.
Just reach out and they'll take it from there!
Contact Us
Choose your Guard
Pick the installation guide for your blinds.
Guard 1
Orders before September 9, 2025

Original tightening mechanism (no screws required)
Gloss-finish aluminum frame
Adhesive logo sticker
Guard 2
Orders on or after September 9, 2025

Slim 1-inch low-profile frame
Tightening mechanism with 2 corner screws
Metal logo plate

Not sure which version you have?
Orders before September 9, 2025 are Guard 1. Orders on or after September 9, 2025 are Guard 2.
Tightening mechanism
GUARD 1
Slider mechanism
GUARD 2
Screw mechanism
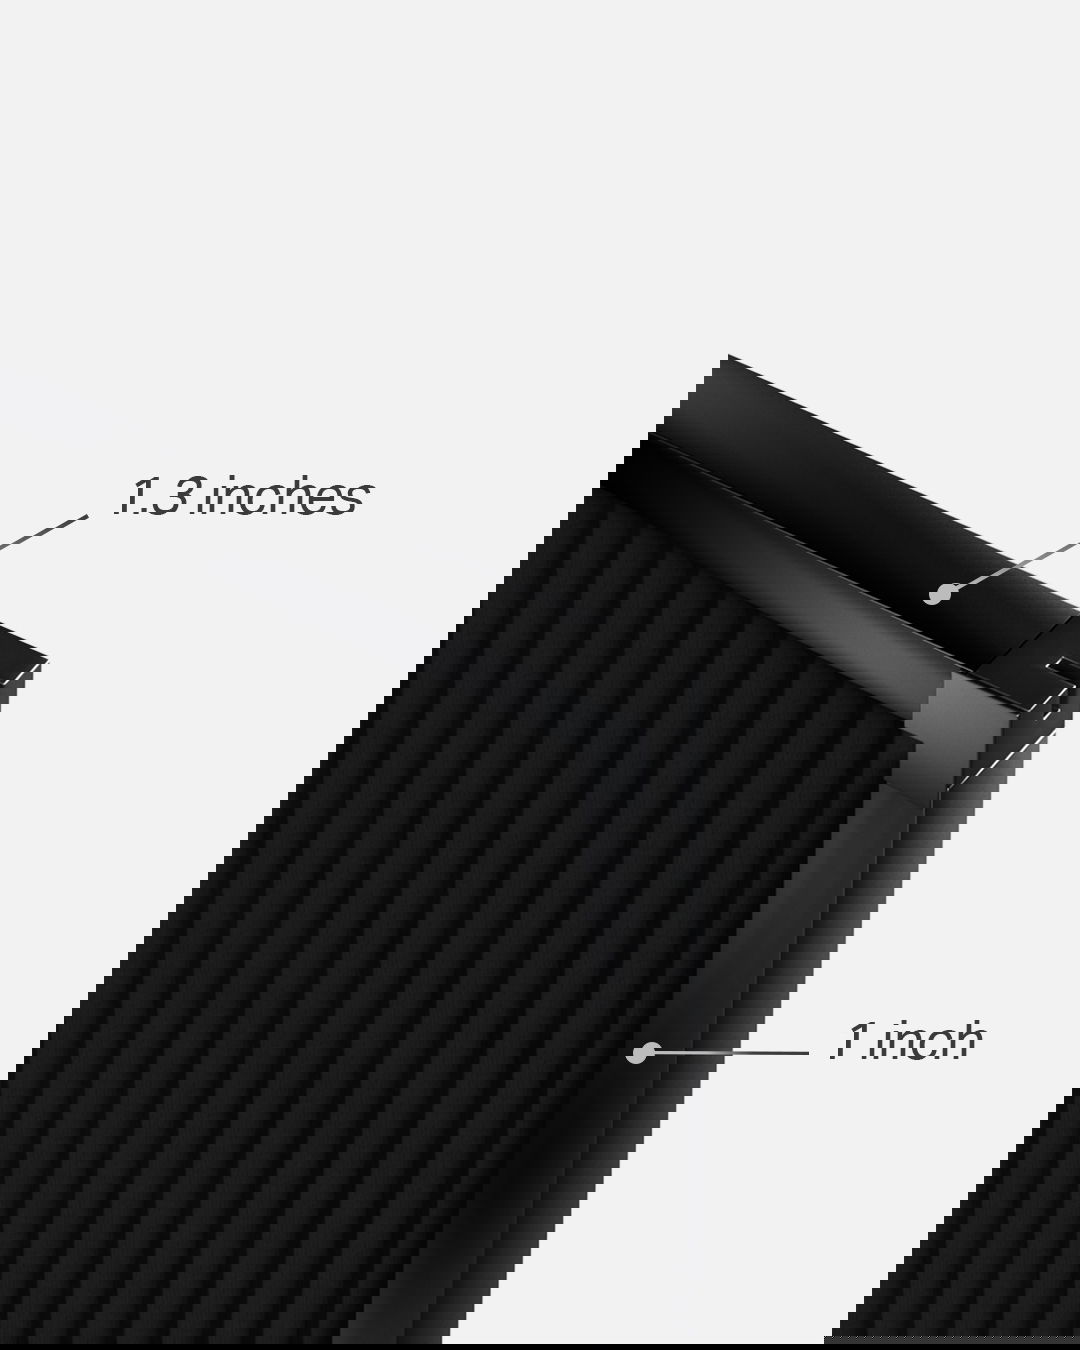
Frame width
GUARD 1
1.3-inch frame
GUARD 2
Slim 1-inch frame
Logo design
GUARD 1
Logo sticker
GUARD 2
Metal logo plate
Tightening mechanism
GUARD 1
Slider mechanism

GUARD 2
Screw mechanism
Frame width
GUARD 1
1.3-inch frame
GUARD 2
Slim 1-inch frame
Logo design
GUARD 1
Logo sticker
GUARD 2
Metal logo plate
Still not sure?


